Are rainbow cookies a NY thing?
Italian Rainbow Cookies
These Italian Rainbow Cookies take a little patience and love to put together, but they are really easy to make. The flavor of these cookies is so much better than the ones you’ll buy at a bakery! The most beautiful addition to your Christmas cookie tray.Are rainbow cookies a NY thing?
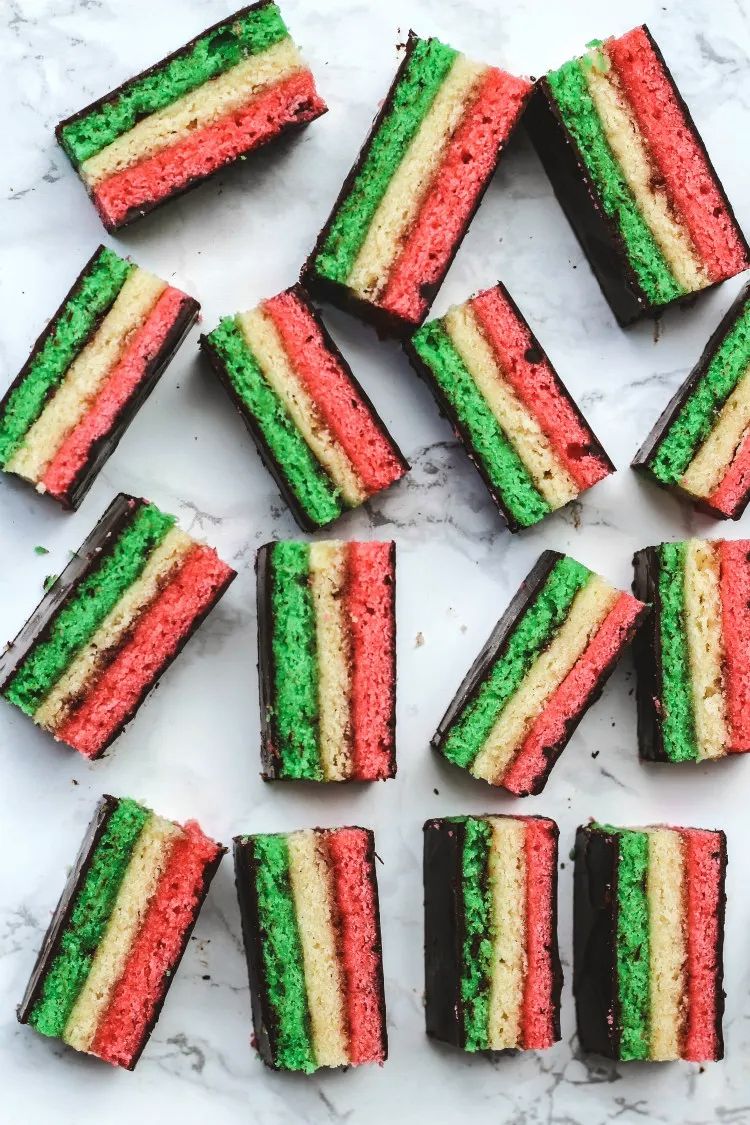
Yes, rainbow cookies, also known as tri-color cookies or Italian flag cookies, have a strong association with New York, particularly within Italian-American communities. Originally from Italy, these colorful cookies were embraced and popularized in New York City's Italian bakeries. They consist of three layers of almond sponge cake, colored green, white, and red to resemble the Italian flag, and are sandwiched together with apricot or raspberry jam and coated in a thin layer of chocolate. Rainbow cookies are a staple in many New York bakeries and are especially popular during holidays and celebrations.Step 1
Gather all your ingredients.Step 2
beat the egg whites with some of the sugar in mixer until soft peaks form. Set them aside in a clean bowl while you prep the cake batter.Step 3
beat the almond paste with the rest of the sugar. Add in the butter. Next add in the yolks one at a time. Beat it all until its smooth. Mix in the almond extract. The last part is to add in is the flour a little bit at a time. You’re just mixing until it’s combined.Step 4
Add red coloring to one portion and green coloring to the other. Leave one portion white. Mix the colored dyes until combined (and you like the vibrancy of the color…I did about 25 drops each color). Feel free to follow the healthier color directions above (it’s done with matcha and red beets).Step 5
Spread each layer of cake colored cake batter in the prepped baking pans. I used baking sheets and also did a 9×13 baking tray. It does not take long to bake. Just between 8-10 minutes. You do not want to over bake the cake layers. You’ll have dry rainbow cookies.Step 6
Spread half of the strained jam (I used raspberry)over the green layer. It spreads easier if the jam is heated up. You just want a thin layer of jam. Next step is to invert the white layer over the green layer and spread the rest of the jam on the white layer. Carefully place the red layer on the white layer.Step 7
Cover the whole cake with plastic wrap. Place a baking sheet on top of the plastic wrap and weigh it down with books and place in the refrigerator to chill. It’s ideal to chill for 8 hours. I have chilled it for less time and had success with the cookies.Step 8
Melt the chocolate and spread it on the red part of cake in a thin layer. Use an offset spatula. You want to be sure the layer is thin. Chill until it is firm (chill uncovered about 15 minutes). Once it is chilled, place wax paper onto the chocolate layer, place on a baking sheet, invert it onto the baking sheet. Spread the remaining chocolate on the green layer (I forgot to get a photo!!). Trim the edges. Chill for 30 minutes.Step 8
Once the chocolate is very firm (I chilled for about 30 minutes), use a serrated knife to begin slicing the cake into rows. When you have the rows sliced, you begin to slice into the mini cakes (cookies). Make sure the knife is cleaned after each cut.More Stories
Chocolate Crackle CookiesCuccidati-Sicilian Fig Cookies
Prep Time: 30 Min
– 4 large eggs separated – 1 cup sugar – 1 8-oz can almond paste – 2½ sticks 1 1/4 cups margarine (or butter), softened (10 oz or 285 grams total of butter) – 1 teaspoon almond extract – 2 cups all-purpose flour – 1/2 teaspoon salt – 25 drops red food coloring – 25 drops green food coloring – 1 12-oz jar apricot or raspberry preserves, heated and strained – 7 oz fine-quality bittersweet chocolate not unsweetened, choppedCook Time: 10 minutes Ingredients